

I start by using a Faber Castell PITT pen (XS)
to loosely mark in shape and leaves.
I like working directly in pen as I find I don't second guess myself
like I do with pencil.

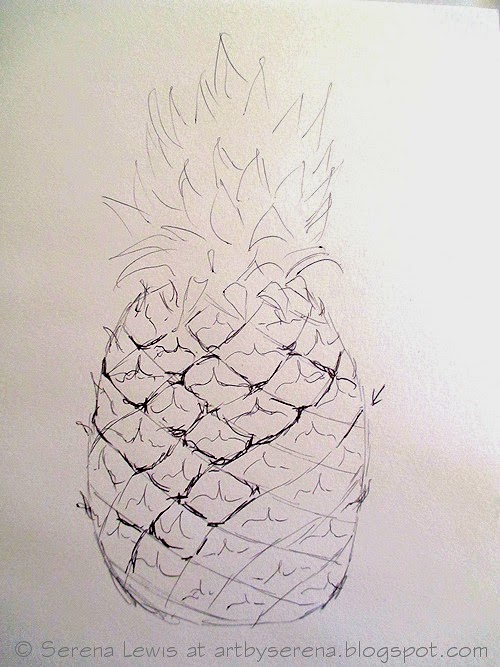
Note how a pineapple has diagonal lines curving around it's shape
and crossing over in two directions to form a loose diamond design.

After laying the foundation, I add more detail and shading with a PITT pen (M)

Then some watercolour to finish it off.
 Medium - Pen and Watercolour
Paper - Moleskine sketchbook (approx. 5"x8")

Using a fine (005 or 1) ink pen, I lightly sketch in those diagonal lines.
In doing so, I am able to keep track of the individual segments as I loosely sketch them in.
I use 'hit and miss' lines when working on the segments and
I also make them darker and more pronounced in some areas according to what I see.
This helps to make the pineapple appear more natural.
You can see that the pineapple in the example below is already taking shape.

After laying the foundation, I add more detail and shading with a PITT pen (M)

Then some watercolour to finish it off.

Paper - Moleskine sketchbook (approx. 5"x8")
I really enjoyed this informative step-by-step post and your finished sketch is great! I'm hoping to finish my first completed sketchbook soon (thanks to Sketchbook Skool!) and I'll be ready to buy a new one. Right now I'm using a Canson mixed media sketchbook which isn't the greatest for watercolor. I've heard a lot about Moleskines but I've never tried them. Would you recommend it? (http://jamiegregorysketchblog.wordpress.com)
ReplyDeleteI popped on over and commented on your blog. Your Canson mixed media sketchbook would probably take watercolour better than the Moleskine sketchbooks. However, Moleskine also make watercolour notebooks which are better suited for watercolours. :)
DeleteSerena, that's a great sketch and awesome tutorial. I will soon gather up some of my pens and sketchbook and come back and follow the instructions. Hopefully soon, because it is a good lesson. Thanks a lot.
ReplyDeleteThanks, Gloria. Glad you enjoyed the lesson. :)
DeleteThat's a great sketch of a pineapple, then you can eat the subject when finished.
ReplyDeleteMerle................
Thanks, Merle. The pineapple was so sweet and juicy....delicious!
DeleteThat is a cool tutorial Sereena. Thank you so much for sharing
ReplyDeleteThanks, Shashi! xo
DeleteEven with your wonderful tutorial, I doubt I could ever make a pineapple look that good--LOL!
ReplyDeleteI really loved seeing the step-by-step. :)
Awwwww, thanks Rita, but I'm sure you would do a good pineapple sketch too. :) xo
DeleteLoved the tutorial, but I'd have to find somebody to donate the pineapple to afterwards :)
ReplyDeleteThanks. You don't like pineapples, Nigel?
DeleteLoved the tutorial--good help on darkness of shadow side--is it strictly more lines on that side to darken or do you use a color to shade--I used purple which seemed to work.
ReplyDeleteHi Robyn,
DeleteI'm glad you liked the tutorial. As I sketched the pineapple mostly with an ink pen, I used more dense cross-hatching on the shadow side although I did also add a strip of darker colour too. Purple would have worked well too.
Thanks for visiting,
Serena :)